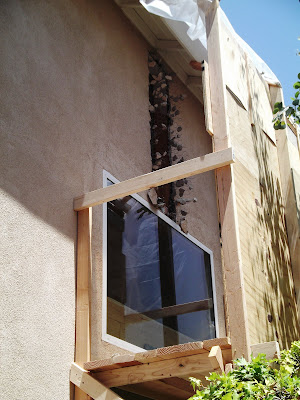
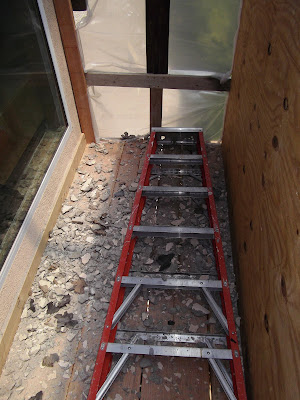
Tuesday, May 31, 2011

Memorial Day weekend – the window goes in

Sunday, May 29 and Monday, May 30:

Window flashing is tedious, boring work. It absolutely has to be done correctly. Therefore, I resolved to take a chill pill and spend parts of two days painstakingly mucking with the mess.

The most important concept:  You always start from the lowest point and work your way upward, lapping the materials over each other. The idea is that if any water gets behind the stucco, the membranes will funnel the moisture behind the stucco down to "weep holes" at ground level, keeping it away from the wood because of the way the flashing and paper is lapped.

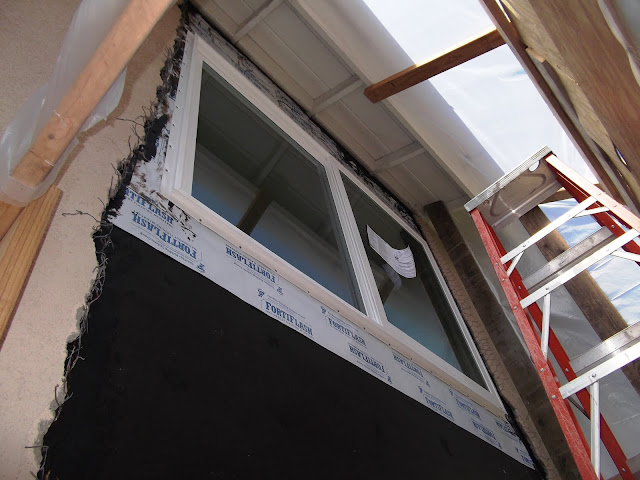
Above and below:  Starting at the top edge of the lower window, I tied new flashing into the existing moisture barrier behind the stucco using plastic asphalt roofing cement.


The white membrane is "Fortifiber" self-adhesive window flashing. The black stuff is heavy-duty asphalt building paper. As I worked from bottom to top, I lapped each piece over the other, using liberal amounts of sealant to join the new materials with the edges of the existing paper behind the stucco.
 
 
My son, Chris, who had come over for a Memorial Day barbecue, helped me install the window. It is a two-person job to get the heavy, awkward assembly centered into the space, then get it perfectly level and plumb.

You cannot even depend on the vinyl frame to stay "square."  After I drove a few nails in, I measured the diagonals to make sure that they were equal, only to discover that the rectangular shape had slightly deflected to a trapezoid.  So we had to pry a top corner of the window frame horizontally about 1/4" to re-square it prior to final nailing.  

If a window is not perfectly level, plumb, and square, it won't close perfectly.


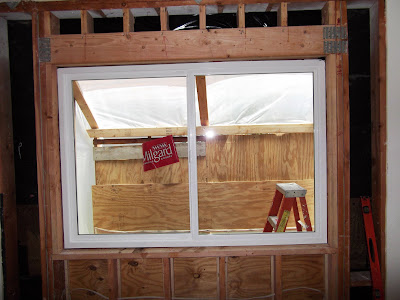
Interior view of the new Milgard window.

On the inside, I packed fiberglass insulation into all the wall cavities that don't require electrical or structural inspection.


Sunday, May 29, 2011

If I could only work this fast!

Sunday, May 29, 2011

This brief, time-lapse video shows the basic steps in framing the new window opening:

Thursday, May 19, 2011

Readying the wall for flashing

Thursday, May 19:

We have had sporadic showers the past few days that are making the outside wall damp though the plastic over the scaffold is keeping direct rain off of everything.  I am waiting for a warm, dry day to begin installing window flashing and a moisture barrier on the outside wall.  Meanwhile, this morning I chipped a little more stucco around the top corners of the lower window and cleaned up that window's top edge.
To gain access to the top of this plate-glass window, I had to temporarily remove one of the scaffold boards. Now I have to be careful not to drop a hammer onto the glass or worse, fall through the opening!
I chipped the stucco down a few inches below the top edge of this window.  This will allow me to lap new flashing over the existing paper barrier. I plan to smear black asphalt roofing cement over this old paper and glue the new flashing to it. 

Some blowhard worker at Home Depot told me just to use caulk that roofing cement would be "overkill."

"I probably installed 500 windows as a carpenter, and none ever leaked," the guy said. 

Of course, my experience with contractors is that they are long gone by the time a window starts leaking, especially in a place like California where one can go six or nine months with no rain.

Why take a chance? The paper barrier is asphalt-based.  The new flashing is asphalt-based.  It makes sense to me to use petroleum-based asphalt-cement for a really good bond.  Sure, it's messier, but I am only doing this once. I can use rubber gloves.   If I did this for a living, I'm sure I'd be just like Mr. Home Depot Know-It-All and use caulk, which would be less messy and much faster.

To get the surfaces really clean, I had to vacuum out all the tiny stucco chips that had fallen down into the cracks.
The flashing will lap down into the channel-frame of this window. Therefore I had to get it as clean as possible by removing old paper barrier scraps, staples, nails, stucco mesh and caulk.

Wednesday, May 18, 2011

VoilĂ ! A wall


Wednesday, May 18:

Lemonade stand open for business?  My new room is taking shape.

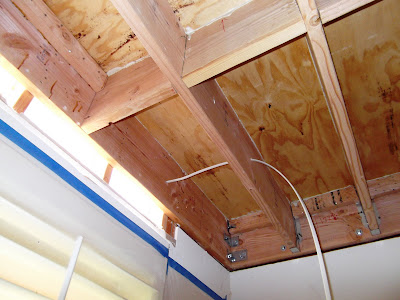
Above and below: Rough wiring for the electrical outlets for this wall. I had to get this wiring in now because the feed had to come through the dining room ceiling joists (below) and these lower coffers are about to become inaccessible.
This is No. 12 romex cable (12 gauge wire). In the photos below, you can see that I ran the cable through the first two joists and then left the rest of it coiled on the dining room floor.  I won't route the cable any farther until I determine where the other outlets will be placed in the new tea room. No sense drilling holes through the joists in the wrong places!
Once I put the wiring into the wall, I could stuff it with insulation the same fiberglass that came out of the old wall.  Above: looking up from the dining room. Below: the same insulation batts viewed from the outside.

With the wiring and insulation complete in the lower wall, I proceeded to cut five panels of 1/2" plywood and nail them into the recessed frames. This Freeman air nail-gun is cool. It will shoot a range of ammo – from 2" nails to 3 1/2".
The sheathed outside wall. The white strip is the top edge of the large, dining-room window. My next step will be to remove some of this scaffolding and clean up the top of that window strip so that I can cover the entire wall with a waterproof barrier.  The flashing will extend down to this dining room window and wrap down the two sides by a few inches – just enough to make a watertight barrier.

Tuesday, May 17, 2011

Closing in on the lower wall

Tuesday, May 17:

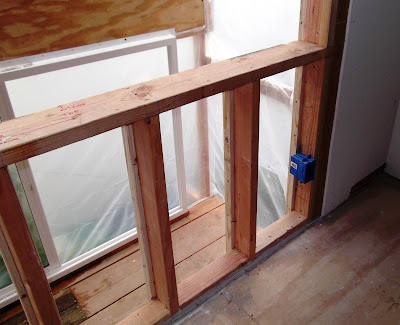
With the window framing complete, I turned my attention to the lower wall, the outside of which I need to fill in with plywood so that I can install a waterproof barrier  and then mount the actual window.
How excited can I get about a little blue box? Pretty excited, actually, because it means electrical work, which is pure, clean fun. Before I close the wall on the outside, I need to run a wire from the ceiling below to feed two outlets on this wall.
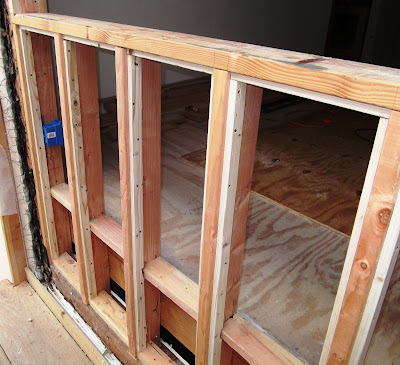
I used 1x2 recessed strips for inner frames I will mount 1/2" plywood panels into each opening so that the plywood is flush with the outside edges of the studs.  A water-barrier will go over the plywood, then stucco mesh and stucco.  The plywood will give me strong backing to trowel against when applying stucco.

But before I install the plywood panels, I need to do two things: (1) thread the electrical wire up into wall; (2) put pink insulation into the lower coffers, which will no longer be accessible once the plywood goes on.   (The upper coffers floor to windowsill will still remain open on the inside, so I can insulate those sections anytime prior to hanging drywall.)

Window header beam takes the weight

Sunday, May 15:

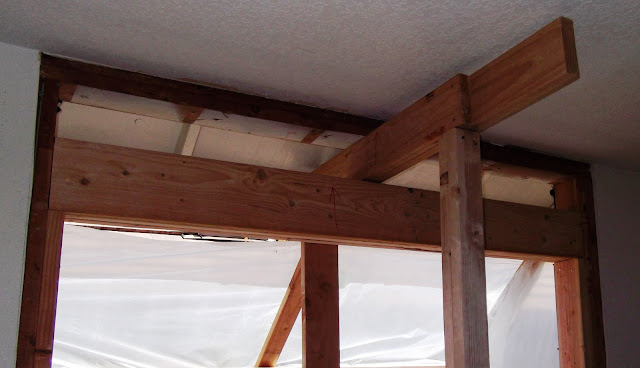
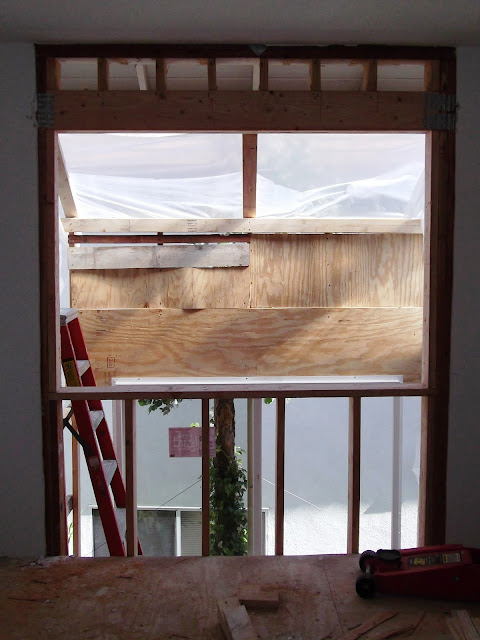
With the installation of the header and cripple studs above it, I was able to remove all the temporary supports that were holding up the wall.

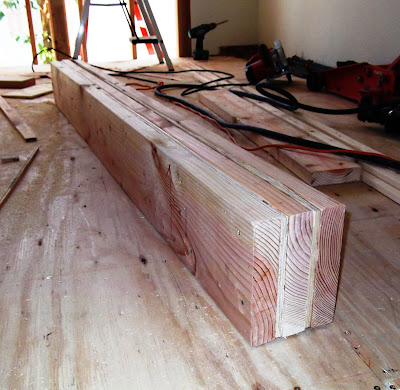
A "sandwich" of wood: I built this header beam out of three 2x8s, with a layer of 1/2" plywood sandwiched between each stick of lumber. The total width of the header is 5 1/2" the thickness of the wall framing. With all the tight grains in such lumber, a manufactured beam like this is much stronger than one solid piece of wood and one would be hard pressed to even find a 5 1/2" x 7 1/4" beam like this anywhere.
Once I nailed the header together, I had to get it into the opening. I started by propping one end of the heavy beam atop the right "jack stud."  Then I crawled up on the ladder outside and lifted the left end and pounded it sideways into the opening.  (Note:  The two temporary posts and beam continue to hold the ceiling/roof up.)

Below: The header now sits atop the jack studs (a.k.a "trim studs").
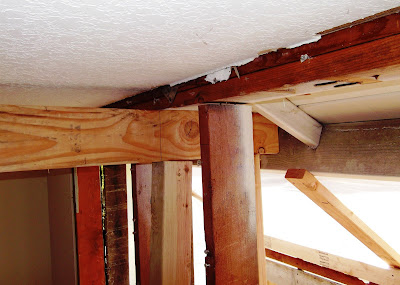
I designed the placement of this header to leave 1/4" of clearance below the temporary beam so that I can pull the beam out when it is no longer needed.
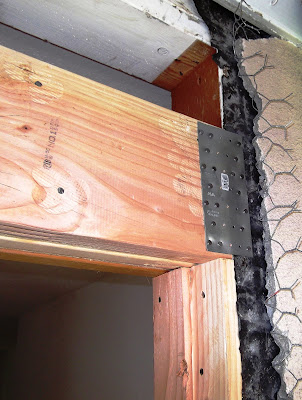
In addition to nailing the header directly into the surrounding framing, I used steel mending plates at each end to help hold everything together.
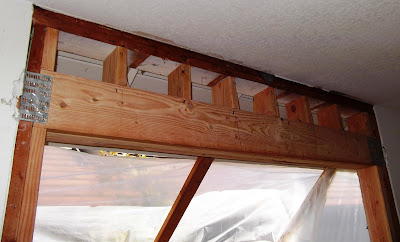
The "cripples" (above and below): Once I pounded in all these "cripple studs" (actually, short blocks), all of the sheer weight from the roof and ceiling is being transmitted down to the header and to the outside edges of the window frame.  Therefore, I could remove the temporary posts and beam.
The last major structural challenge of this tea room project is now complete!

Friday, May 13, 2011

A new windowsill

Thursday, May 12:

The new wall is starting to take shape with the installation of this windowsill.

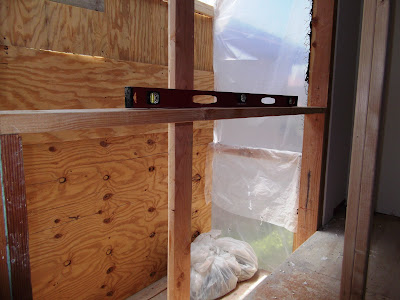
I cut four 2x6 studs, each 46" long.   In new construction, these likely would be spaced 16" center-to-center. For my purposes, I just spaced them out equally, with approximately 13" between each.  First I nailed the sill on each end.  Then I nailed each stud at the top, making sure they all crowned in the same direction to the outside of the house.
When working with old and new lumber, frequently there are surprises.  Due to an uneven wall, and a floor joist that bowed out slightly, the lower ends of these new studs were hanging about 1/4" over the outside edge of the beam that I needed to join them with.   I took some pipe clamps (the red and blue gizmos in the photo) and was able to squeeze them in most of the way prior to nailing them. What little overhang was left I smoothed with a chisel.

Going to this sort of trouble with the pipe clamps and then a chisel likely sounds like obsessive-compulsive behavior. Certainly, most carpenters wouldn't bother with such a small detail.  But i want to avoid any irregular surfaces that might damage the stucco underlayment when I install it.  Also, I enjoy trying to impose my will on crooked wood to put it back on the straight and narrow.
This is the view from the dining room, showing how I squeezed the studs tight against that edge-joist using the four long pipe clamps.  (I inherited these pipe clamps from my Dad and have used them in all sorts of projects over 40 years.)   Then, I got up on a ladder in the dining room and shot nails through the edge-joist into the bottoms of the four studs to help hold them tight against the joist.
After toe-nailing the studs into the beam, I cut some short blocks and pounded them down flat between each stud setting them 1/2" back from the edge. 

Why the 1/2" setback?  Because I intend to place a small sheet of 1/2" plywood into each opening so that it forms a flush outside surface with the studs.  This will give me a firm backing as I am troweling stucco against the wall next month. 

Wednesday, May 11, 2011

Planning the new window opening

Wednesday, May 11:

Using simple addition, I calculated the position of the new window sill by working my way down from the ceiling:

  • Space above the new window header:  5   3/4"
  • Height of new window header:              7  1/4"   (the thickness of a 2x8 triple-beam)
  • Height of window opening:                  48  3/4"  (allowing some wiggle room at the top and bottom)
  • Thickness of window sill plate:              1  1/2"   (the thickness of a 2x6)
          Total:                                                          63  1/4" 

Why 5 3/4" above the window header?  Because I am going to install the new header slightly below the temporary beam that is currently supporting the ceiling/roof.  That beam (see previous post) is made of 2x6's which are 5 1/2" tall.   The new window header will be 1/4" lower that way I can easily pull the temporary beam out of there once the permanent header is holding everything up.

I measured the 63 1/4" down from the undersurface of the top wall plate and placed a mark on the wall. The old, existing undersill stud on the right end was all ragged and split up with nails, so I pried it out and installed a new 2x6 stud that came up to the mark for the right-end of the window sill.  (For the left-end of the sill, I simply sawed off the top of the existing old stud at the correct level.)
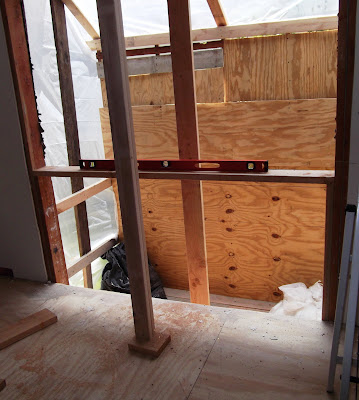
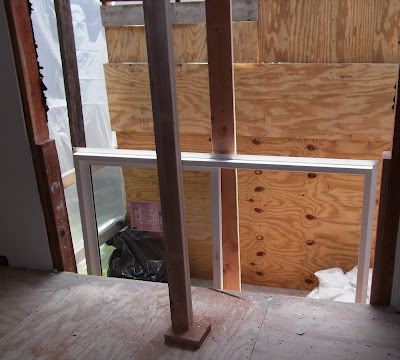
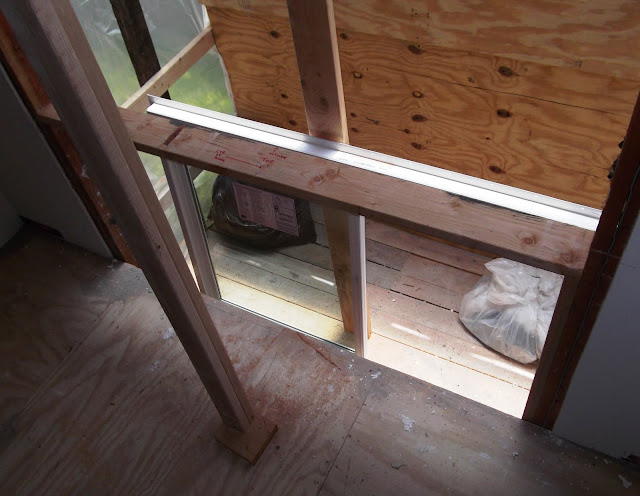
Above and below:  Making sure the two ends of the sill are level. Prior to actually nailing the sill and installing the studs below it, I need to drag the new window from the upstairs office through this huge opening out onto the scaffold.  (Windows are always installed from the outside of the house)
The window was a custom-order from Lowe's. It is a "Milgard," with double-pane low-E glass in a strong vinyl frame excellent quality and value (probably 1/3 the cost of an Andersen window). To make it lighter, I removed the sliding portion and then muscled it out onto the scaffold.
Now that the window is on the outside, I can frame the wall.  (The white plastic bundle on the outside scaffold contains all the broken glass from the old plate-glass window. The black bag is full of stucco debris. Once the trash is collected Thursday, I plan to push these heavy bundles off the end of the scaffold bombing them directly into the trash cart.  Managing the waste on a construction job sometimes entails as much planning as the actual construction!)

Tuesday, May 10, 2011

A huge opening in the upstairs wall

Tuesday, May 10:

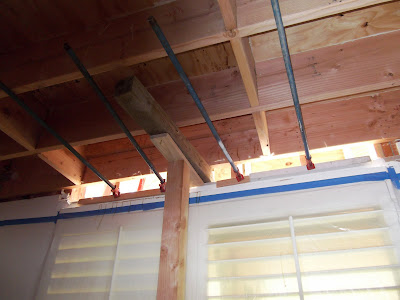
Using two car jacks and a bit of ingenuity, I managed to install solid bracing to support the ceiling and roof. I now have a huge opening in the wall that will soon be reframed with a new window.

I created a short 4"x 6" beam (about 3 feet long) by screwing together two pieces of 2x6. I set the beam atop a 4x4 post, and jacked it upward against the wall plate. In this photo, the large 4x4 that is slightly cocked is pressing the beam and plate upward.  Below:  A wider view.


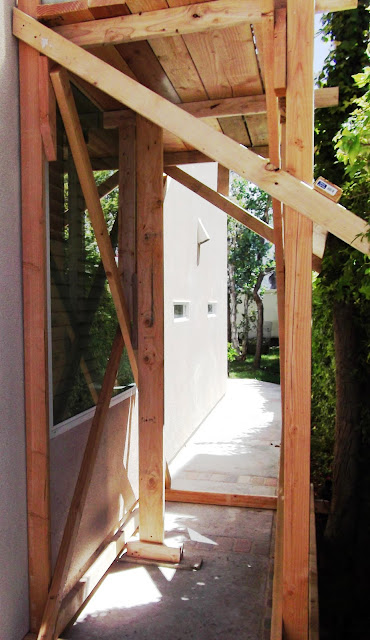
The scaffold needed to be strengthened to support a second car jack and upper post to that 4x6 beam way up top.  So I installed this 2x6 post directly below the point on the scaffold floor that would hold the car jack and upper post.
Dueling jacks: One inside, one outside. Together, they are temporarily pushing the 4x6 beam and ceiling plate upward.
Note the small gap above the top of this stud this represents the amount of sag in the plate: approximately 3/16".  The sheer weight of the wall-plate is being supported by the horizontal beam that is being pressed upward by the car jacks.

With both jacks holding up the beam, I jammed strong posts under each end. I used screws to hold the posts to the beam and to the floor and to the scaffold floor on the outside.  Now the posts are holding the weight, so I could remove the jacks.

The old window header is now supporting nothing.  I took a hammer and knocked out those last two studs, then I sawed through the header and removed it.
A clear opening now exists in the wall. The two posts are supporting the ceiling/roof. Now I will be able to start framing the wall for a new window.  Before I do so, however, I plan to drag the window through this large opening and set it onto the scaffold.  Once it's out there, I can frame up this wall and then install the window.

From this point onward, most of this Tea Room project will consist of construction rather than destruction.  For me, psychologically, construction is a thousand times more rewarding.

"Removing" the plate-glass window . . .

. . . rather, taking it out with a brick!

Monday, May 9:
After considerable deliberation, I decided to remove this window by destroying it. I probably would have broken it anyway while chipping away all the stucco on the outside.  And even if I had gotten it out intact, how would I dispose of it? Waste Management wouldn't take it, so I would have had to waste time and gas hauling it to the dump, where they would charge me a disposal fee.

To catch the glass, I stapled a trough of double-thick plastic out on the scaffold.

Next, I took a brick and smashed the plate glass.  That was fun!

Then I took a yard hoe and knocked out the rest of the glass.


The glass pit: Everything worked as designed.  (Note the red brick!) The glass fell neatly into the pit.  I continued smashing the large pieces with the hoe and then rolled up all the plastic and tied it with a rope.  It's quite heavy.   On trash day, I will push the tied-up bundle of glass off the edge of the scaffold and drop it directly into the trash cart.

Once the glass was out, it was easy to pry the vinyl window frame out of the wall and break it into small pieces.  After that was removed, I chipped the rest of the stucco out.

Friday, May 6, 2011

More stucco removal

Friday, May 6:  I finished covering the scaffold with thick plastic sheeting, then went inside and continued pounding out stucco.

With the scaffold covered in plastic, I have a nice little "greenhouse" to work in. The plastic is to keep the chunks of masonry from flying all over the yards as I pound it out from the inside.

The large section of stucco to the right came out easily. I chipped all around the edges with a framing hammer, then pounded the center with a sledge hammer. A huge chunk still held by the wire mesh went flopping down and slammed against the glass. I was relieved the glass didn't break I want the enjoyment of busting it intentionally!  Perhaps I will make a video of the event.

Thursday, May 5, 2011

Busting stucco

Cinco de Mayo:

The backstop worked as planned.  I shrouded three-fourths of it in plastic, then started wailing on the wall from the inside with my framing hammer.  Here are the results:


Above and below: The scaffolding caught most of the mess as I pounded the wall from the inside. I had to clip through the stucco-mesh periodically as I worked my way down.

This is some of the debris that would have ended up in the neighbors' yard. Instead, I have confined the mess to the scaffold.
I worked my way down between the two studs to the top of the window-header. Next, I will knock out all the stucco to the left and right and build a temporary brace to support the top-plate while I am reframing the wall. (After I was done this morning, I stapled some plastic over this opening to keep the birds and bugs out.)